Wavy cube infill

I came up with this way to make cubic infill but instead every cube has 3 convex faces and 3 concave faces.

Every layer could be printed with wavy lines, but in my prototype they were printed as separate line segments and the ordering wsa not efficient.

I printed them in TPU.

Conclusion: there is not much merit in this type of infill structure.

Support Brim

Last week I started a print in TPU with PLA support, but the support failed because it doesn’t adhere to the brim which I printed in TPU.

To fix my print I used hotglue to (melt the support and) glue the support to the brim. That hack worked!

In the meantime I decided that this behaviour should be improved. I wrote a feature which replaces the regions under support with a brim printed in the same material as the support. That way the adhesion of the support to the buildplate is improved and the brim region next to the object is still satisfied – albeit with 2 different materials.

Robust Connect Infill Polygons

The features to connect infill polygons together in order to get continuous extrusion for all infill patterns was not very stable. It is quite hard to reliably find a location where you can cross to another polygon and it often happens that that crossing doesn’t permit a crossing back, so that the bridge between two polygons cannot be created. The implementation is now improved.

Whereas it used to connect 65% of all polygons before it now connects 99.5%.

Hopefully this improvement can be merged to Ultimaker Cura shortly.

Permeable prints

In some cases you might want a 3D print with a very permeable structure. For example when using a 3D print as a mold for vacuforming, the permeability is used to transport the air out. Another example is when combining 3D printing materials with casting materials; in order to optimize the adhesion between the two materials, the casting materials permeates a bit into the 3D printed structure.

There are several ways in which to create such a structure. In this post I describe one which consists of a couple of simple Cura settings.

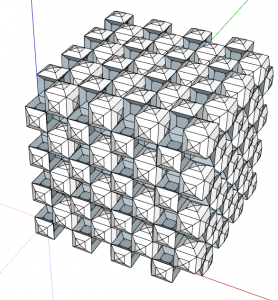
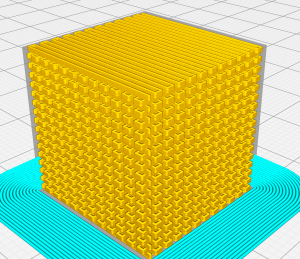
The idea is to print the whole object with infill only, so we set the Top/Bottom Thickness and the Wall Thickness to zero.
Then we set the Infill Pattern to Zig Zag and the Infill Density to 50%.

Now here’s the catch: we set the Infill Line Directions to [ 0,0,0,0,0,0,90,90,90,90,90,90 ]

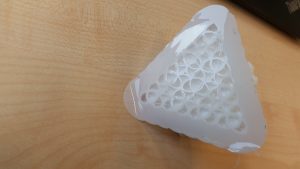
We end up with a print which is rather porous and has little resistance to air flow.

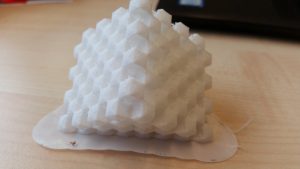
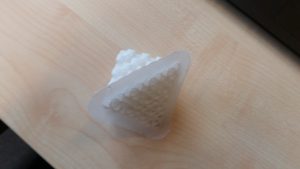
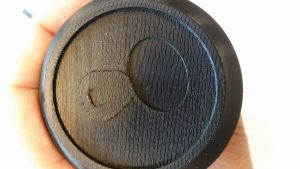
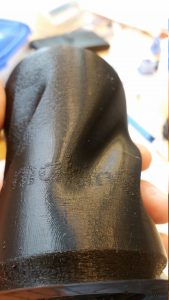
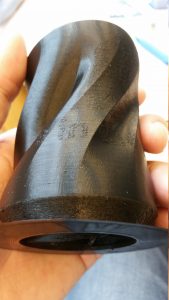
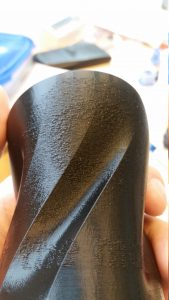
I’ve printed one with TPU. Here’s the result.
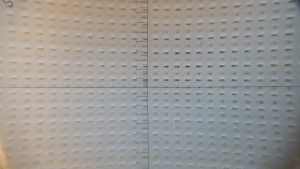
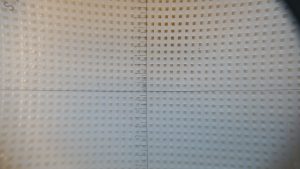
Top:

Side:

Variable Fuzzy Skin

I realized that after having implemented Fuzzy skin texture mapping I have never showed any examples using the method.

Perhaps this is an interesting line of research after all.

I’ve printed an example below to show the capabilities of the technology.
However, this is not really a good real world example.

This technique could be interesting for making the surface of a handle bar more rough to give it more grip, while keeping the rest of the object smooth.

Top of the can showing 3 different roughness levels:

Side showing the word ‘making’ in a more rough surface finish.

Side showing the word ‘in’ in a more rough surface finish.

Side showing the Cura logo in two different levels of roughness.